Focus Peaking Action and Tutorial for Photoshop
Focus peaking is a relatively new feature that is currently making its way into the newer digital cameras that are coming out. Peta Pixel reported on this feature appearing on the latest Sony cameras here:
One of the interesting technologies Sony introduced into its line of NEX mirrorless cameras last year (starting with the NEX-C3) was “focus peaking”, a feature from the video recording world that highlights in-focus areas of an image to aid in manual focusing. You know those colorful pixels that image editing programs use to indicate blown out or underexposed areas of photos? It’s like that, except for focus. What’s awesome is that you can adjust things like focus, focal length, and aperture, and then see the depth of field adjust on your screen in real time.
You can see a video below of how this works:
Basically the areas of the image that are in focus are being highlighted by the camera so that you can easily see what will be in focus when you take the shot. It enables you to fine tune the focus precisely the way you want.
It’s a very nice feature to have on the camera. But this got me thinking. When editing pictures in Photoshop, I often find myself wanting to edit only the parts of a picture that are in focus, or sometimes just the parts of a picture that are out of focus. For example, when applying noise reduction to images, I usually want to do this mostly for the out of focus areas (bokeh) of an image, and leave the detail inside the in focus areas intact. Wouldn’t it be awesome if we had a selection feature in Adobe Photoshop or Lightroom where we could easily select only the areas of an image that are in focus? The way this would work is exactly like the “Color Range” selection process in Photoshop, but only instead of a range of colors, it would select a range of focus. It would start by selecting the areas that are sharply in focus, and you could then increase the range/radius to include more of the picture in your selection extending more to the out of focus areas.
To my knowledge there’s no such feature in Photoshop or in any plugins that I know of. So I decided to try and see if I could use the functionality that is currently in Photoshop to build a selection in an image of only the areas that are in focus. It turns out that it’s possible to do this, although it’s not quite perfect, and you can even create an action to automate the process. It should be relatively easy for Adobe to include such a focus selection option in Photoshop, but until they do, we’ll have to use a different way.
Method
The way I’ve tried to do this is by trying to detect the edges and details inside an image that are sharply in focus mostly by using a High Pass filter. Once you have the edges that are in focus selected, you can expand the selection around those edges and get a rough, sometimes even pretty accurate, selection of the areas in an image that are in focus. This method is by no means perfect, but it can help if you want to quickly and automatically select the areas of an image that are in focus. You can then refine the mask/selection afterwards if needed.
Some issues with this method:
- The high pass filter sometimes will also include areas of an image that are out of focus, but still contain high contrast, such as highlights in bokeh. These can easily be edited out of the mask in the end, but unfortunately right now I don’t know of any way to make this more accurate and would need more time to figure it out and experiment.
- Since the high pass filter detects contrast in images, parts of an image that are in focus but don’t contain a lot of detail or contrast won’t be detected as areas that are in focus.
- A lot depends on the size of the image when using the actions that are available for download below. For example, the Expand, Smooth and Feather options which are used in the actions have a radius set that is optimized for images between 10-21 megapixels in size. For smaller images this radius should be lower, otherwise the selection will expand to include out of focus areas of an image and possibly the entire image. The same can be said about the settings for the High Pass filter and the Color Range selection. The radius and ranges are optimized for 10-21 megapixel images. You can experiment with your own settings to see what gives you better results for a specific image.
Obviously trying to create this functionality in an action is limiting and won’t always give the best results. Only the Photoshop guys at Adobe or a plugin developer has the kind of low level access and flexibility to be able to make this better.
Below are some examples to show that it does work:
In the examples below I used sample images from the Canon EOS 1DX from Canon Inc’s website.

In focus areas are highlighted in bright red (after Focus Peaking Lines Only action). On the left you can see the selection you end up with when using the Focus Peaking action.
Actions
You can download actions that automate the steps shown in the below tutorial by clicking on this link. There’s a .atn file in the zip file which you can open in Adobe Photoshop. There are 3 actions inside this file:
- Focus Peaking – This is the main action that uses the High Pass filter to create a mask with areas that are in focus. This action is explained in the tutorial below.
- Focus Peaking Custom Filter – This action uses the Custom filter instead of the High Pass filter to achieve roughly the same results.
- Focus Peaking Lines Only – This action only makes a new layer that contains the edges of areas that are in focus in bright red color.
PLEASE NOTE: Run these actions on the background layer after opening the image in Photoshop. These actions are optimized for images that are between 10-21 megapixels in size. For smaller images you may need to adjust certain settings as explained in the tutorial below. These actions only work for 8-Bits/Channel and 16-Bits/Channel images (the Color Range selection option is not available for 32-Bits/Channel images in Photoshop).
Tutorial
I’ve created a step by step tutorial below to show how to simulate focus peaking in Photoshop. You end up with a mask containing a rough selection of the areas in an image that are in focus. I’ll be using the image below in this tutorial. You can download a high resolution version here.
 Focus Peaking Tutorial Step 1 — First we open the image in Photoshop.
Focus Peaking Tutorial Step 1
First we open the image in Photoshop.
 Focus Peaking Tutorial Step 2 — We then duplicate the background layer and create a new identical layer.
Focus Peaking Tutorial Step 2
We then duplicate the background layer and create a new identical layer.
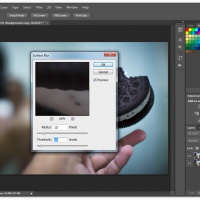 Focus Peaking Tutorial Step 3 — Then we apply a surface blur to the new layer. This is to smooth out fine detail, especially digital noise, so that edges become more clearly defined and to minimize the risk of out of focus areas also becoming selected. A radius of 15 and threshold of 19 should be enough. If the image doesn't have a lot of digital noise, it's better to skip this step.
Focus Peaking Tutorial Step 3
Then we apply a surface blur to the new layer. This is to smooth out fine detail, especially digital noise, so that edges become more clearly defined and to minimize the risk of out of focus areas also becoming selected. A radius of 15 and threshold of 19 should be enough. If the image doesn't have a lot of digital noise, it's better to skip this step.
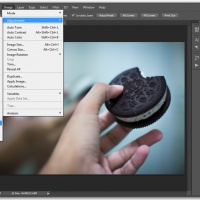 Focus Peaking Tutorial Step 4 — We then desaturate the layer. Skipping this step can give better results but may include more high contrast areas in out of focus parts of an image.
Focus Peaking Tutorial Step 4
We then desaturate the layer. Skipping this step can give better results but may include more high contrast areas in out of focus parts of an image.
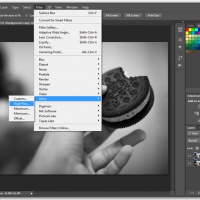 Focus Peaking Tutorial Step 5a — We then apply a High Pass filter to the layer.
Focus Peaking Tutorial Step 5a
We then apply a High Pass filter to the layer.
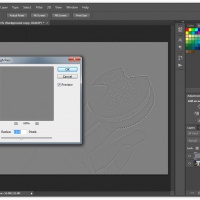 Focus Peaking Tutorial Step 5b — A radius of 10 should be enough to bring out the detail and edges of the areas of the image that are in focus. Note that the amount entered here depends on the resolution of the image and dept of field. A value of 10 is enough for an image that is between 10-21 megapixels in size. For smaller images use less. The effect should be applied so that the edges remain thin and well defined.
Focus Peaking Tutorial Step 5b
A radius of 10 should be enough to bring out the detail and edges of the areas of the image that are in focus. Note that the amount entered here depends on the resolution of the image and dept of field. A value of 10 is enough for an image that is between 10-21 megapixels in size. For smaller images use less. The effect should be applied so that the edges remain thin and well defined.
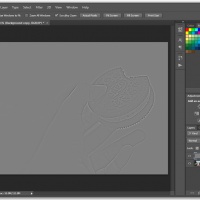 Focus Peaking Tutorial Step 5c — This is the result after the High Pass filter has been applied to the layer with a radius of 10.
Focus Peaking Tutorial Step 5c
This is the result after the High Pass filter has been applied to the layer with a radius of 10.
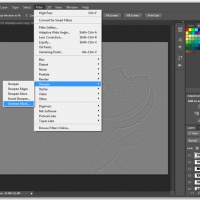 Focus Peaking Tutorial Step 6a — We then apply an Unsharp Mask filter to the layer to bring out the edges a lot more.
Focus Peaking Tutorial Step 6a
We then apply an Unsharp Mask filter to the layer to bring out the edges a lot more.
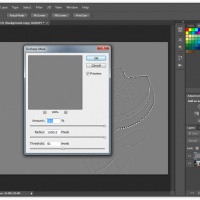 Focus Peaking Tutorial Step 6b — We then apply an Unsharp Mask filter to the layer to bring out the edges a lot more.
Focus Peaking Tutorial Step 6b
We then apply an Unsharp Mask filter to the layer to bring out the edges a lot more.
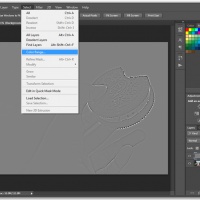 Focus Peaking Tutorial Step 7a — Next we choose the Color Range option to build a selection based on colors.
Focus Peaking Tutorial Step 7a
Next we choose the Color Range option to build a selection based on colors.
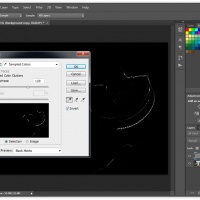 Focus Peaking Tutorial Step 7b — The neutral gray color in the image is sampled and the Fuziness is set to 120.
Focus Peaking Tutorial Step 7b
The neutral gray color in the image is sampled and the Fuziness is set to 120.
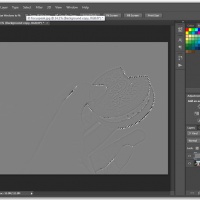 Focus Peaking Tutorial Step 7c — This is the selection after the Color Range option has been used.
Focus Peaking Tutorial Step 7c
This is the selection after the Color Range option has been used.
 Focus Peaking Tutorial Step 7d — Here we can see the areas in focus in bright red after applying the Color Range selection.
Focus Peaking Tutorial Step 7d
Here we can see the areas in focus in bright red after applying the Color Range selection.
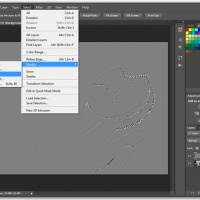 Focus Peaking Tutorial Step 8a — Next we need to expand the selection to include more of the image that's in focus.
Focus Peaking Tutorial Step 8a
Next we need to expand the selection to include more of the image that's in focus.
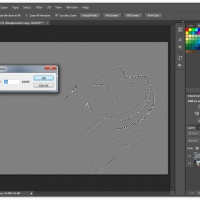 Focus Peaking Tutorial Step 8b — The selection is expanded with 50 pixels. Note that the amount entered here depends on the resolution of the image and dept of field. A value of 50 pixels is enough for an image that is between 10-21 megapixels in size. For smaller images use less.
Focus Peaking Tutorial Step 8b
The selection is expanded with 50 pixels. Note that the amount entered here depends on the resolution of the image and dept of field. A value of 50 pixels is enough for an image that is between 10-21 megapixels in size. For smaller images use less.
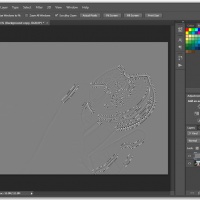 Focus Peaking Tutorial Step 8c — The selection after using the Expand option.
Focus Peaking Tutorial Step 8c
The selection after using the Expand option.
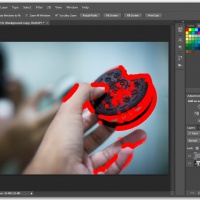 Focus Peaking Tutorial Step 8d — Here we can see the areas in focus in bright red after applying the Expand selection option.
Focus Peaking Tutorial Step 8d
Here we can see the areas in focus in bright red after applying the Expand selection option.
 Focus Peaking Tutorial Step 9a — Next we need to smooth out the selection.
Focus Peaking Tutorial Step 9a
Next we need to smooth out the selection.
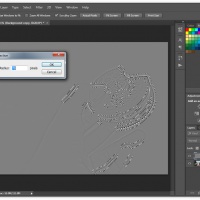 Focus Peaking Tutorial Step 9b — The selection is smoothed out with a radius of 70 pixels. Note that the amount entered here depends on the resolution of the image and dept of field. A value of 70 pixels is enough for an image that is between 10-21 megapixels in size. For smaller images use less.
Focus Peaking Tutorial Step 9b
The selection is smoothed out with a radius of 70 pixels. Note that the amount entered here depends on the resolution of the image and dept of field. A value of 70 pixels is enough for an image that is between 10-21 megapixels in size. For smaller images use less.
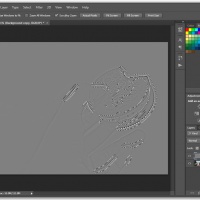 Focus Peaking Tutorial Step 9c — The selection after using the Smooth option.
Focus Peaking Tutorial Step 9c
The selection after using the Smooth option.
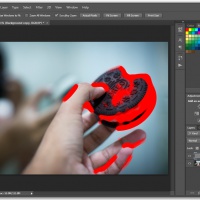 Focus Peaking Tutorial Step 9d — Here we can see the areas in focus in bright red after applying the Smooth selection option.
Focus Peaking Tutorial Step 9d
Here we can see the areas in focus in bright red after applying the Smooth selection option.
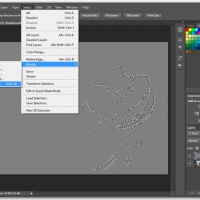 Focus Peaking Tutorial Step 10a — Next we need to feather the selection. Use a radius of 50. Note that the amount entered here depends on the resolution of the image and dept of field. A value of 50 pixels is enough for an image that is between 10-21 megapixels in size. For smaller images use less.
Focus Peaking Tutorial Step 10a
Next we need to feather the selection. Use a radius of 50. Note that the amount entered here depends on the resolution of the image and dept of field. A value of 50 pixels is enough for an image that is between 10-21 megapixels in size. For smaller images use less.
 Focus Peaking Tutorial Step 10b — The selection after using the Feather option.
Focus Peaking Tutorial Step 10b
The selection after using the Feather option.
 Focus Peaking Tutorial Step 10c — Here we can see the areas in focus in bright red after applying the Feather selection option.
Focus Peaking Tutorial Step 10c
Here we can see the areas in focus in bright red after applying the Feather selection option.
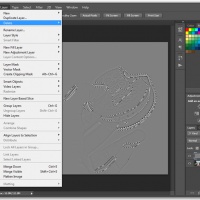 Focus Peaking Tutorial Step 11 — Now we can delete our temporary working layer while the selection remains.
Focus Peaking Tutorial Step 11
Now we can delete our temporary working layer while the selection remains.
 Focus Peaking Tutorial Step 12 — We again duplicate the background layer, while the selection is still active.
Focus Peaking Tutorial Step 12
We again duplicate the background layer, while the selection is still active.
 Focus Peaking Tutorial Step 13a — Click on the Create Layer Mask button to create a mask on the new layer.
Focus Peaking Tutorial Step 13a
Click on the Create Layer Mask button to create a mask on the new layer.
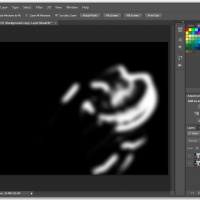 Focus Peaking Tutorial Step 13b — By Alt-Clicking on the layer mask in the Layers Panel you can see what the mask looks like. The white areas are the areas that are in focus and are visible in the mask.
Focus Peaking Tutorial Step 13b
By Alt-Clicking on the layer mask in the Layers Panel you can see what the mask looks like. The white areas are the areas that are in focus and are visible in the mask.
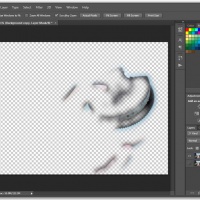 Focus Peaking Tutorial Step 13c — By making the background layer invisible, we can more clearly see the in focus areas that are included in the mask.
Focus Peaking Tutorial Step 13c
By making the background layer invisible, we can more clearly see the in focus areas that are included in the mask.
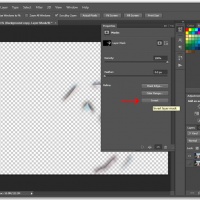 Focus Peaking Tutorial Step 14a — We can also invert the mask so that the out of focus areas are visible, instead of the areas that are in focus. Depending on the processing we want to do both of these options can come in handy.
Focus Peaking Tutorial Step 14a
We can also invert the mask so that the out of focus areas are visible, instead of the areas that are in focus. Depending on the processing we want to do both of these options can come in handy.
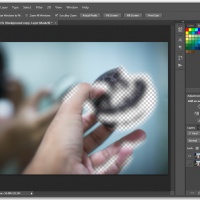 Focus Peaking Tutorial Step 14b — By making the background layer invisible, we can see that the out of focus areas are now visible in the mask. We can now apply filters to this layer, such as noise reduction, without affecting the areas of the image that are in focus.
Focus Peaking Tutorial Step 14b
By making the background layer invisible, we can see that the out of focus areas are now visible in the mask. We can now apply filters to this layer, such as noise reduction, without affecting the areas of the image that are in focus.
Updates
I will be posting updates here when there are bug fixes and/or improvements to the actions. If you run into any issues let me know. If you have suggestions for improvements also let me know. 🙂 The latest update can be downloaded here.
- Sept. 03, 2012: Fixed an error in the Focus Peak Lines Only action that was causing a “Could not complete the command because the selected area is empty.” error.


Comments
There are 14 responses. Follow any responses to this post through its comments RSS feed. You can leave a response, or trackback from your own site.